8.2.2. Create and Populate an GFS2 Partition
Now that the cluster stack and integration pieces are running smoothly, we can create an GFS2 partition.
This will erase all previous content stored on the DRBD device. Ensure you have a copy of any important data.
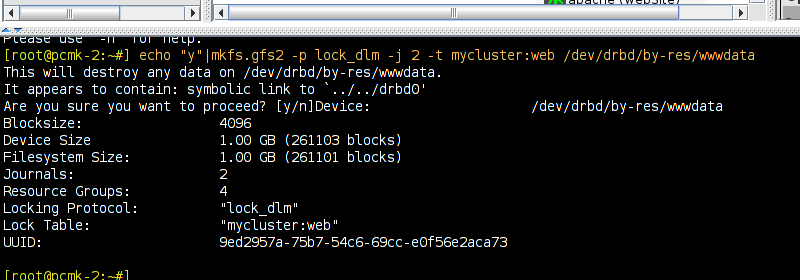
We need to specify a number of additional parameters when creating a GFS2 partition.
First we must use the -p option to specify that we want to use the the Kernel’s DLM. Next we use -j to indicate that it should reserve enough space for two journals (one per node accessing the filesystem).
Lastly, we use -t to specify the lock table name. The format for this field is clustername:fsname. For the fsname, we need to use the same value as specified in corosync.conf for cluster_name. Just pick something unique and descriptive and add somewhere inside the totem block. For example:
totem {
        version: 2

        # cypto_cipher and crypto_hash: Used for mutual node authentication.
        # If you choose to enable this, then do remember to create a shared
        # secret with "corosync-keygen".
        crypto_cipher: none
        crypto_hash: none
        cluster_name: mycluster
  ...
Do this on each node in the cluster and be sure to restart them before continuing.
We must run the next command on whichever node last had /dev/drbd mounted. Otherwise you will receive the message:
/dev/drbd1: Read-only file system
Then (re)populate the new filesystem with data (web pages). For now we’ll create another variation on our home page.
# mount /dev/drbd1 /mnt/
# cat <<-END >/mnt/index.html
<html>
<body>My Test Site - GFS2</body>
</html>
END
# umount /dev/drbd1
# drbdadm verify wwwdata#


